There are few things quite as disheartening for a homeowner as looking out the window and seeing a once-beautiful yard ravaged by severe weather, pest infestations, or simply years of unavoidable neglect. A damaged exterior does not just diminish the curb appeal of your property; it takes an emotional toll. The yard should be a sanctuary, a place to host friends, let children play, and unwind after a long day. When that space is compromised by deep ruts, dead branches, or crumbling hardscapes, it transforms from a source of pride into a heavy source of stress.
However, it is vital to remember that the exterior of your home is just as critical as the interior. Timely exterior repairs prevent cascading damages that can eventually threaten the primary structure of your house. What starts as a simple drainage issue can quickly escalate into a compromised foundation, and a seemingly minor dead branch can become a devastating projectile during the next major storm. Preserving your property value and ensuring the safety of your family requires proactive, consistent maintenance.
Restoring a compromised yard is not a chaotic, disorganized endeavor; rather, it is a systematic, step-by-step process. You cannot simply plant new flowers and expect the yard to thrive if the underlying soil and structural integrity are fundamentally broken. This comprehensive guide will take you through a logical progression of yard restoration. We will begin with assessing the raw damage and securing structural safety, move through correcting the earth and managing water systems, and finally culminate in restoring the greenery and aesthetic comforts that make your outdoor space truly feel like home.
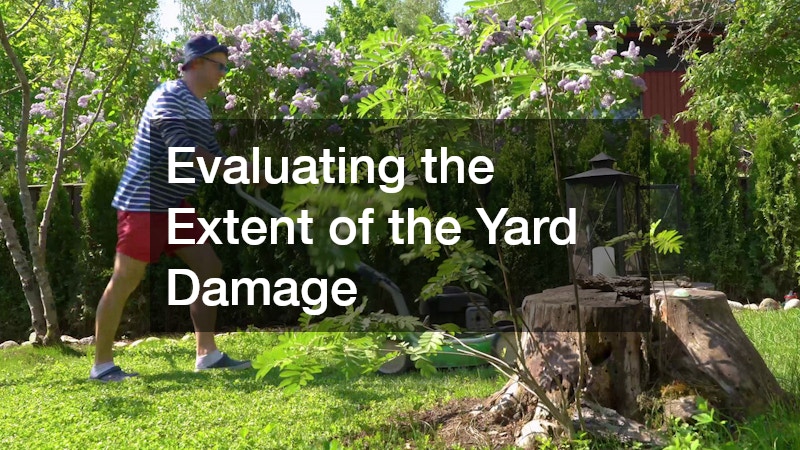
Evaluating the Extent of the Yard Damage
Conduct a Comprehensive Walkthrough and Document Issues
Before you purchase a single bag of soil or start up a power tool, you must understand exactly what you are dealing with. Treating the symptoms of yard damage without understanding the root cause is a recipe for wasted time and money. Homeowners should approach their yard like a professional inspector. Arm yourself with a notepad, a pen, and a camera or smartphone to systematically document every inch of your property. It is often best to conduct this walkthrough in the morning or late afternoon when the lighting casts shadows, making uneven ground and subtle depressions much easier to spot.
As you walk the property lines, categorize the damage you see into three distinct buckets: safety hazards, structural or health issues for your plants, and purely cosmetic problems. Safety hazards include anything that poses an immediate risk to humans, pets, or the house itself. This might be a deep hole obscured by tall grass, a leaning retaining wall that threatens to collapse, or shattered glass and debris from a recent storm. Structural and health issues relate to the ecosystem of the yard. Look for standing water that indicates poor drainage, soil that has washed away from the base of plants, or foliage that is severely discolored and wilting. Finally, note the cosmetic issues. These are the eyesores—peeling paint on a fence, missing mulch, or overgrown, messy shrubbery. Documenting everything thoroughly ensures that you have a master list to reference as you begin the hard work of restoration.
Prioritize Repairs by Safety and Structural Impact
Once you have your master list, the next critical step is prioritization. It is incredibly tempting to jump straight into the fun, aesthetic projects, but a strategic timeline is essential. You must fix safety hazards and structural failures first. If you ignore a tripping hazard or fail to secure a shifting retaining wall, you risk injury or catastrophic property damage. There is absolutely no point in investing a significant amount of money into a brand new landscape installation if the soil beneath it is actively washing away or if a dying tree is threatening to crush the new garden bed.
Setting a realistic budget is deeply tied to this prioritization process. By focusing on safety and structural integrity first, you ensure that your initial funds are protecting your primary asset: your home.
-
Triage the immediate dangers: Block off unsafe areas, fill deep holes temporarily, and secure loose structures.
-
Address the foundation of the yard: Plan your budget around earthmoving, drainage correction, and soil health before buying plants.
-
Phase the cosmetic work: Break the aesthetic improvements into seasonal projects to avoid overwhelming your finances and your weekend schedule.
Correcting Soil Erosion and Drainage Problems
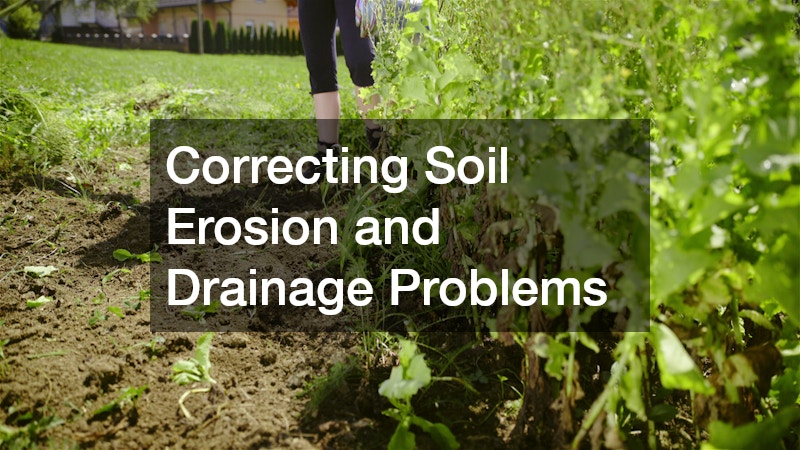
Identify Pooling Water and Redirect Runoff
Water is the most destructive force in any outdoor environment. If your yard cannot effectively manage rainfall, every other improvement you make will eventually be ruined. The best time to understand your yard’s drainage dynamics is actually during a heavy rainstorm. Put on a raincoat and boots, and walk your property while the rain is falling. Observe exactly where the water is coming from, the paths it takes across your lawn, and where it ultimately pools and stagnates.
Standing water is not just a nuisance; it is a major liability. It drowns the root systems of your grass and plants, creates a breeding ground for mosquitoes, and turns usable lawn space into a muddy, impassable bog. Once you have identified the problem areas, you can implement actionable drainage solutions.
-
French Drains: These are essentially trenches filled with gravel and a perforated pipe that redirect surface water and groundwater away from a specific area. They are highly effective for large, soggy areas of lawn.
-
Dry Creek Beds: If you have a natural slope where water carves a rut, lining that natural path with heavy stones and river rock creates a beautiful, functional dry creek bed that controls the water’s speed and prevents soil erosion.
-
Catch Basins: For areas where water pools deeply, a catch basin installed at the lowest point can collect the runoff and pipe it safely away to the street or a designated drainage zone.
Reshape the Earth to Protect Your Home’s Foundation
The single most important rule of home exterior maintenance is ensuring “positive drainage.” This means that the earth surrounding your house must slope away from the foundation. Building codes generally recommend a slope that drops at least six inches over the first ten feet away from the foundation walls. If the earth has settled over time, or if landscaping projects have inadvertently raised the soil level near the house, water will flow back toward your basement or crawlspace, leading to catastrophic water intrusion, mold, and structural decay.
Correcting this issue involves reshaping the earth, a process known as grading. While minor dips and small low spots can often be filled by a homeowner with a few bags of topsoil and a rake, extensive slope correction is a different matter. If your yard slopes dramatically toward your house, or if fixing the slope requires moving massive volumes of heavy, compacted dirt, you will likely need professional intervention. In these instances, bringing in professional grading contractors is necessary. They possess the heavy machinery, laser levels, and topographical expertise required to safely and effectively alter the earth without accidentally damaging underground utilities or exacerbating the problem.
Revamping Your Watering Systems for Efficiency

Test Your Current Setup for Leaks and Coverage Gaps
Once the earth is stabilized and excess water is managed, you must turn your attention to how you actively hydrate your yard. A neglected or damaged watering system is a double-edged sword: it wastes a massive amount of water, inflating your utility bills, while simultaneously killing your plants through either overwatering or underwatering. To begin, you need to perform a comprehensive audit of your current system.
Run a manual cycle on your watering system, turning on one zone at a time. Do not just turn it on and walk away; you need to physically walk the property and inspect every single head and line while the water is flowing. You are looking for specific indicators of failure.
-
Sputtering Heads: This often indicates a cracked line underground letting air into the system, or a clogged filter within the head itself.
-
Geysers: A massive spray of water shooting straight up means a spray nozzle has been completely broken off, often by a lawnmower.
-
Low Pressure: If all heads in a zone are barely trickling, there is likely a massive underground leak bleeding the pressure before it reaches the surface.
-
Dry Patches: Brown, crispy sections of grass indicate poor head placement or clogged nozzles preventing proper water overlap.
Identifying these issues early allows you to perform vital sprinkler repairs before the harsh heat of summer sets in, saving your plants from stress and preventing thousands of gallons of wasted water from seeping into the ground unnecessarily.
Upgrade to Smart Controllers and Drip Lines
Older, outdated watering systems operate on rigid timers that run regardless of the actual weather. This means your system might be furiously pumping water onto your lawn while a torrential rainstorm is happening. Upgrading your system’s technology is one of the best investments you can make for the long-term health of your yard.
Modernizing begins with the “brain” of the system. Smart controllers connect to your home’s Wi-Fi and pull local weather data. They automatically adjust watering schedules based on temperature, humidity, recent rainfall, and evaporation rates. Furthermore, consider how the water is delivered. Spray heads are incredibly inefficient for garden beds and shrubs, as much of the water evaporates before it hits the soil or lands on the leaves, promoting fungal diseases. Transitioning these zones to targeted drip lines delivers water directly to the base of the plant, right at the root zone, reducing water usage significantly. Because designing and retrofitting these complex systems requires specific calculations regarding water pressure and flow rates, consulting with professional irrigation services is highly recommended to ensure the modernized system is engineered correctly.
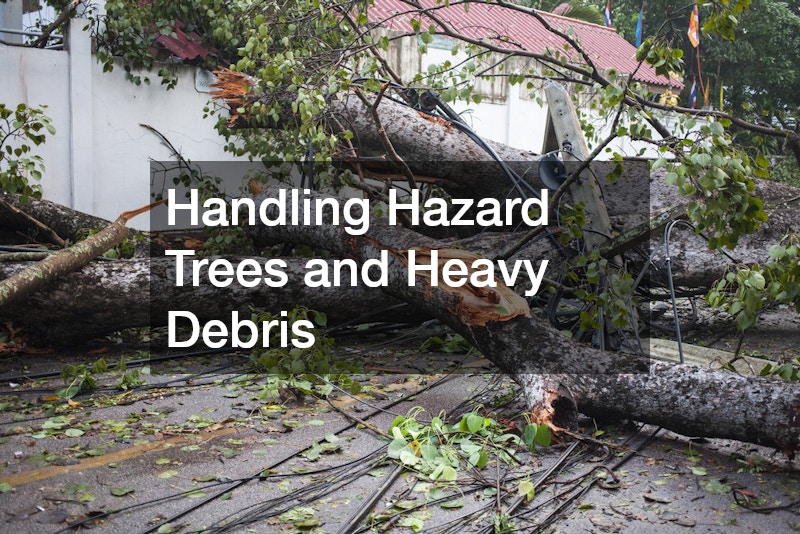
Handling Hazard Trees and Heavy Debris
Inspect Trunks and Canopies for Signs of Decay or Disease
Trees are often the most valuable living assets on a property, providing shade, oxygen, and immense visual appeal. However, when a tree is damaged by a storm, infested by pests, or suffering from a deep-rooted disease, it transforms from an asset into a massive, heavy liability. Homeowners must learn to read the signs of distress in their timber to prevent disastrous property damage or injury.
You should perform an inspection of your trees at least twice a year, and immediately following any severe weather event. Start at the bottom and work your way up.
-
The Base and Roots: Look for fungal conks or mushrooms growing out of the base of the trunk or on the main root flares. This is a primary indicator of root rot, meaning the structural anchor of the tree is decaying. Also, check for severed roots or soil heaving around the base, which indicates the tree is beginning to lean dangerously.
-
The Trunk: Inspect the bark for deep, vertical cracks, large cavities, or areas where the bark is peeling away to reveal dead wood underneath. Look for fine sawdust at the base, which suggests borer insect activity inside the trunk.
-
The Canopy: Step back and look at the crown of the tree. Are there massive, dead branches (often called “widow-makers”) hanging loosely? Is there significant “dieback,” where the tips of the branches are bare and brittle while the rest of the tree has leaves?
Recognizing these signs early can be the difference between saving a tree with proper pruning and having it crash through your living room roof during the next high-wind event.
Safely Clear Large Falling Hazards Before They Strike
When a tree is severely compromised, the instinct for many handy homeowners is to grab a ladder and a chainsaw to fix the problem. This is incredibly dangerous. Logging and arboriculture consistently rank among the most hazardous professions in the world. Large branches hold massive amounts of kinetic energy, and they rarely fall exactly how or where an untrained person expects them to. Furthermore, working at heights with heavy, dangerous power tools introduces a high probability of severe injury.
When you identify a dangerous condition in a large tree, it is imperative to vet and hire a certified, fully insured tree company. These professionals have the bucket trucks, rigging equipment, and deep understanding of wood physics necessary to dismantle a massive organism safely, piece by piece, without damaging the surrounding property. If an expert arborist determines that a tree cannot be saved and poses an imminent threat to your home, they will utilize complete tree removal services to fell the timber, grind the stump, and haul away the massive volume of debris, leaving your yard safe and clear.
Restoring Pathways, Patios, and Aquatic Perimeters
Seal Cracks and Resurface Walkways to Prevent Tripping
The hardscapes in your yard—the pathways, sidewalks, and entertainment areas—bear the brunt of foot traffic, heavy furniture, and harsh weather. Over time, concrete and masonry will inevitably shift and crack. In colder climates, this damage is exponentially accelerated by the freeze-thaw cycle. Water seeps into microscopic fissures in the concrete. When the temperature drops, that water freezes and expands by roughly nine percent, acting like a wedge that blows the crack wide open. When the ice melts, a larger void is left behind, ready to collect even more water the next time it rains.
Interrupting this cycle is vital to preserving your hardscapes and preventing dangerous tripping hazards. For minor damage, homeowners can execute a relatively simple restoration process on a standard concrete patio or garden walkway.
-
Preparation: The crack must be completely clear of organic material. Use a wire brush, a chisel, and a heavy-duty shop vacuum to remove all dirt, weeds, and loose, crumbling concrete from the fissure.
-
Bonding: Apply a liquid concrete bonding agent to the inside of the crack. Old concrete does not naturally bind well to new concrete; the bonding agent acts as a necessary glue.
-
Filling: Force a high-quality masonry patching compound into the crack using a trowel. Overfill it slightly, as the compound may shrink as it dries.
-
Smoothing and Curing: Smooth the surface with the trowel to match the surrounding level, and allow it to cure strictly according to the manufacturer’s instructions before walking on it.
Overhaul Unsafe Aquatic Surroundings
Areas surrounding water features, particularly swimming pools, present entirely unique challenges. These surfaces are subjected not only to the elements but also to constant moisture and harsh pool chemicals like chlorine, salt, and muriatic acid. This combination can rapidly degrade masonry and create slick, dangerous conditions for bare feet.
Furthermore, because pool construction involves massive excavation, the backfilled soil around the pool shell is highly susceptible to settling over time. This sub-surface settling leads to heavy concrete slabs sinking, heaving, or separating entirely. When you inspect your pool area, look for slabs that have shifted vertically, creating a sharp lip that can easily stub a toe or cause a serious fall. While minor sinking can sometimes be addressed with mudjacking or polyurethane foam injection, severe degradation, massive cracking, or structural failure of the underlying earth often dictates that safety demands a total pool deck replacement. Attempting to patch heavily compromised slabs around a deep body of water is a liability that homeowners cannot afford to risk.
Replanting and Refreshing the Aesthetic Details
Suppress Weeds and Retain Moisture with Strategic Ground Cover
With the foundation secured, the drainage flowing properly, and the hazards removed, the final stages of your yard restoration focus on bringing life and beauty back to the space. Replanting is an exciting phase, but newly turned soil and fresh garden beds are incredibly vulnerable. Without protection, the hot sun will bake the moisture out of the dirt, and opportunistic weed seeds will quickly colonize the bare earth, choking out your newly planted flowers and shrubs.
Strategic ground cover is the armor your garden beds need. The first line of defense is often a breathable landscape fabric laid over the bare soil. This fabric blocks sunlight from reaching weed seeds buried in the dirt while still allowing water and nutrients to pass through to the roots of your desired plants. On top of this fabric, you must apply a top-dressing.
-
Organic Mulch: Shredded bark or wood chips are excellent because they break down over time, feeding the soil. They are highly effective at retaining moisture but require topping up every year or two as they decompose.
-
Inorganic Cover: For heavily trafficked borders, areas under downspouts, or in arid climates, utilizing heavy decorative rock is a fantastic, low-maintenance alternative. While rocks do not feed the soil, they provide excellent erosion control, suppress weeds effectively, and offer a striking, permanent visual contrast to the greenery.
Clean, Repair, and Protect Your Exterior Furniture
A beautifully restored yard feels somewhat hollow if the living spaces are neglected. The outdoor furniture is where you will actually sit to enjoy the fruits of your labor, but patio sets endure harsh UV rays, torrential rain, and blowing dirt, leaving them looking battered and uninviting. Restoring your yard must include refreshing these essential aesthetic details.
Begin by giving your furniture frames a thorough cleaning. Metal and heavy plastic frames can usually be gently power-washed, though you must be careful not to strip away protective paint. Wood furniture might require a light sanding and a fresh coat of weather-resistant teak oil or exterior stain to repel water and prevent rot. Look for signs of rust on metal joints and treat them with a wire brush and a rust-inhibiting primer.
The textiles in your yard take the most abuse. Mildew, pollen, and sun-fading can ruin the look of your seating areas. Sometimes, heavily soiled fabrics can be saved with a mixture of warm water, mild dish soap, and a soft-bristled brush, followed by hours of drying in the hot sun to kill mold spores. However, if the fabric is structurally dry-rotted, torn, or permanently stained with deep mildew, the fastest way to breathe immediate life, color, and comfort back into the space is to invest in high-quality, fade-resistant replacement outdoor cushions. Covering your refreshed furniture during heavy storms and storing it in a shed or garage during the harsh winter months will ensure that your investment lasts for many seasons to come.
Conclusion
Restoring a damaged yard is a comprehensive journey that requires patience, planning, and a respect for the underlying structure of the earth. By adopting a systematic approach—beginning from the ground up to fix dirt and drainage, securing the structural safety of your home and trees, and finishing with beautiful, resilient plants and comfortable living spaces—you guarantee that your hard work will endure. It is crucial to remember that property maintenance is a marathon, not a sprint. You do not need to fix everything in a single weekend. Tackling one thoughtfully planned project at a time will yield incredible, transformative results over the course of a single season. The effort you put into the soil today will blossom into a safe, beautiful sanctuary for years to come.