A hard storm can pass through in an hour, but the damage it leaves behind often takes months or years to fully surface. Wind, hail, and heavy rain don’t just affect what you can see from the curb — they can quietly compromise framing, insulation, wiring, and structural connections hidden inside your walls and roofline. Homeowners who only patch the obvious stuff often end up dealing with mold, rot, or electrical issues long after the insurance claim is closed. This guide breaks down the systems most likely to hide storm damage so you know exactly what to inspect, repair, or replace before small problems become expensive ones.
Roof Decking and Attic Framing After Heavy Wind
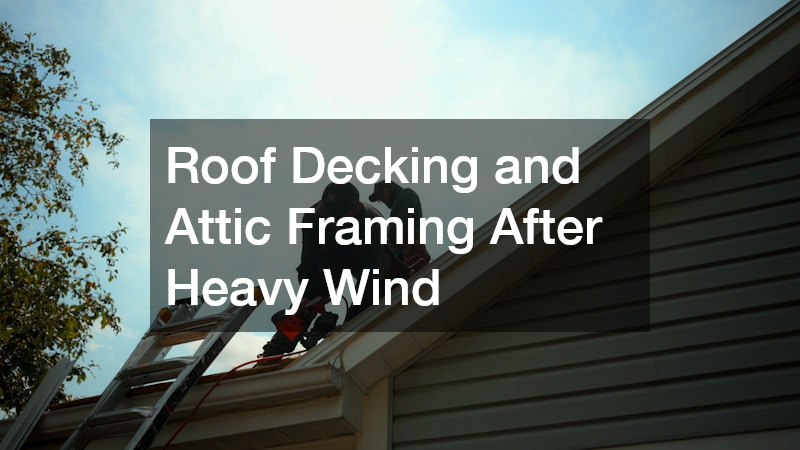
The roof is usually the first thing storms attack, but the visible shingles are rarely the whole story. Wind can loosen the nails holding roof decking to the rafters, a process called nail back-out, creating gaps that let water seep in slowly over weeks rather than all at once. Sustained winds of just 50-60 mph are often enough to work fasteners loose, even when shingles themselves stay largely intact. By the time a stain appears on your ceiling, the plywood or OSB decking underneath may already be soft, delaminating, or sagging between the rafters. A flashlight inspection from the attic can reveal early warning signs: dark streaking along the underside of the decking, a musty odor, or daylight visible through pinhole gaps where nails have pulled through. The attic framing itself deserves equal attention after heavy wind. Rafters and trusses can shift slightly at their connection points, loosening the metal hurricane ties or gusset plates meant to hold the roof structure to the walls. Even a quarter-inch of movement at these joints can compromise the roof’s ability to withstand the next storm, so it’s worth checking connectors for bent metal, popped nails, or visible daylight at the seams.
If your roof took a direct hit from hail or sustained winds above 50 mph, it’s worth having a professional evaluate the decking and framing, not just the shingles. Sustained gusts in that range can loosen nail fasteners, crack rafters, and warp plywood sheathing without leaving any visible sign on the surface. A trained eye can spot soft spots, delamination, or gaps at the roof deck seams that a homeowner walking the attic might easily miss. A full roof installation may sound extreme for what looks like minor surface damage, but replacing compromised decking at the same time prevents a second tear-off a few years down the road. Tackling both issues in one project also saves on labor, since the crew is already up there and the old shingles are already off. While inspecting the attic, ask the contractor to check for daylight coming through the roof boards, water staining on the rafters, and any sagging along the ridge line. These are telltale signs that framing members have weakened and may need sistering or full replacement before new decking goes down. Catching these problems now costs far less than dealing with a collapsed section or mold-ridden insulation later.
- Check the attic for daylight coming through the roof boards, especially near ridges, valleys, and vent penetrations where wind can pry seams apart
- Look for dark streaks or water rings on rafters and sheathing, which often trace back to the exact spot where shingles or flashing failed
- Feel for soft or spongy spots when walking the attic floor or pressing on decking, a sign the plywood is delaminating from prolonged moisture exposure
- Note any musty smell, which often signals trapped moisture even when no visible stains are present yet
- Inspect rafters and trusses for cracks, splits, or slight sagging, since high winds can stress framing without causing an outright collapse
- Check nail heads poking through the decking, which usually means sheathing has shifted or lifted during the storm
- Bring a flashlight and moisture meter if possible; readings above 20% moisture content in wood are a red flag for hidden rot
Chimney Masonry and Flue Liner Integrity
Chimneys take a beating during storms because they stand exposed above the roofline, catching wind, rain, and debris impact that the rest of the house avoids. Cracked mortar joints, shifted flashing, and hairline fractures in the flue liner are common after severe weather, and none of these are visible from the ground. Left unaddressed, water intrusion around the chimney can rot the surrounding roof deck and even affect interior walls near the flue.
A licensed chimney inspection service can run a camera down the flue and check the crown, cap, and mortar joints for storm-related cracking that a homeowner would never spot with a flashlight. This is especially important before you use a fireplace again after a major storm, since a compromised liner can allow heat and gases to reach nearby framing.
- Look for white staining on brick, which indicates moisture penetration
- Check for loose or missing chimney cap components after wind events
- Watch for rusty or cracked flashing where the chimney meets the roof
Gutter and Fascia Damage That Redirects Water
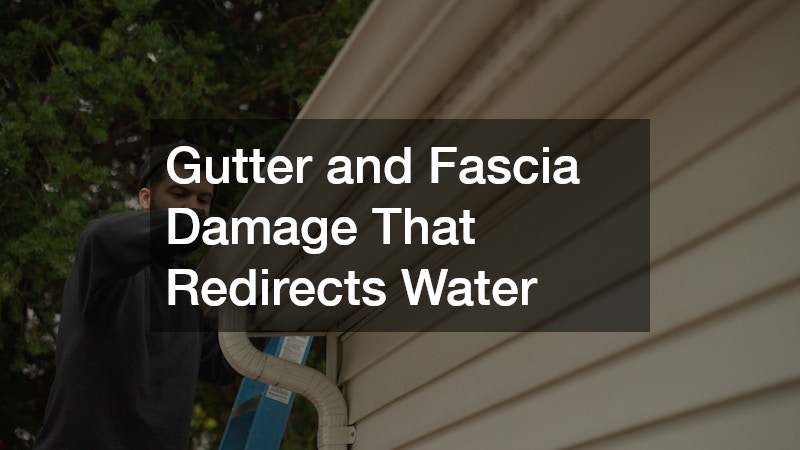
Gutters do more than catch rainwater — they protect your fascia boards, siding, and foundation from erosion and rot. After a storm, sagging sections, pulled fasteners, or dents from hail can throw off the pitch of the entire system, causing water to pool or overflow in places it never used to. That overflow often runs straight down the side of the house, soaking into wall cavities near window and door frames.
If your gutters were installed years ago in standard sections, storm stress can pop the seams apart at exactly the wrong time. Many homeowners use this as an opportunity to upgrade to seamless gutter installers who custom-fit one continuous piece per side of the house, dramatically reducing the leak points that let water infiltrate behind trim and siding.
- Inspect for gutter sections pulling away from the fascia
- Look for water stains or streaking directly below gutter joints
- Check downspouts for proper drainage away from the foundation
Exterior Wall Sheathing and Hidden Moisture Pockets
Wind-driven rain can force water through even small gaps in siding, trim, or caulking, especially when wind speeds exceed 40 mph and drive moisture horizontally rather than letting it run off harmlessly. Once water gets behind the exterior cladding, it often travels sideways or downward along the sheathing before it ever shows up as an interior stain. This means the visible damage inside your home may be several feet away from where the water actually entered, which is why patching only the spot where a stain appears rarely solves the underlying problem. Common entry points include gaps around window flashing, nail holes in siding, cracked caulk joints, and seams where different siding materials meet. A moisture meter can help pinpoint how far the water has spread, since sheathing that reads above 20% moisture content is already at risk for decay even if it looks fine on the surface. Sheathing that stays wet for extended periods, often more than 48 to 72 hours, can lose structural integrity as the wood fibers break down and fasteners lose their grip. That same damp environment becomes an ideal breeding ground for mold, which can spread into insulation, wall cavities, and eventually indoor air if left unaddressed. Catching it early, before the sheathing softens or the mold colonizes a large area, is usually the difference between a targeted repair and a full wall reconstruction.
Because this kind of damage is layered under multiple building materials, it’s usually not a job for patchwork repairs. Wind-driven rain can slip past siding or brick veneer and soak into the sheathing underneath, where it stays trapped against studs and insulation long after the storm has passed. A moisture meter reading above 20% in the sheathing is often the first sign that what looks like a small stain is actually a much bigger problem. General contractors experienced in storm recovery can open up a section of wall, assess how far the moisture traveled, and rebuild the assembly correctly rather than just covering the symptom with a new coat of paint. This typically means checking for soft or delaminated OSB and plywood, inspecting the house wrap or building paper for tears, and confirming that flashing around windows and doors wasn’t compromised. If mold has taken hold, the affected sheathing and insulation usually need to be cut out entirely, not just dried and sealed over. A thorough contractor will also verify that the wall cavity has fully dried, sometimes using a moisture meter over several days, before closing everything back up. Skipping that step is how homeowners end up with the same “mystery” musty smell or peeling paint returning a year or two later.
- Press gently on drywall near exterior walls, window frames, and corners to check for softness or give
- Look for bubbling, peeling, or discolored paint that suggests trapped moisture beneath the surface
- Smell for mustiness in rooms along exterior walls, especially closets and corners, 24-48 hours after a storm
- Check baseboards for warping or gaps where they meet the wall, a sign moisture has traveled downward
- Inspect exterior siding seams and caulking for cracks that could be feeding water into the sheathing
- Note any recurring water stains in the same spot after multiple storms, which often points to a sheathing breach rather than a one-time leak
Electrical Wiring and Panel Exposure to Water Intrusion

Electrical systems don’t always announce storm damage right away, which makes them one of the more dangerous hidden risks. Water that enters through a compromised roof or wall can travel along wiring runs, corrode connections, or pool inside outlet boxes long before anyone notices a flicker or a tripped breaker. In older homes especially, this kind of slow degradation can quietly increase fire risk over time.
Any time you suspect storm damage near wiring, outlets, or your electrical panel, it’s worth having a licensed electrician test the circuits before turning anything back on. This is genuinely a safety issue, since damp insulation around wires can short out unpredictably weeks after the storm has passed, and a panel that looks fine from the outside can still hide corroded breakers or moisture trapped behind the cover plate.
- Watch for flickering lights or outlets that feel warm to the touch
- Check for a burning smell near panels or switches after heavy rain
- Test GFCI outlets in rooms that share a wall with storm damage
Plumbing Lines Strained by Ground Shift and Debris
Severe storms don’t just bring wind and hail — heavy rainfall can saturate soil around your foundation, causing shifts that stress underground plumbing lines and connections. Cracked pipes, slow leaks, and joint separations often go unnoticed until a water bill spikes or a damp spot appears on a basement wall. Tree roots loosened by saturated ground can also invade older sewer lines that were previously stable.
If your home experienced flooding or significant ground saturation, it’s smart to have plumbers run a camera inspection on main lines before assuming everything is fine just because the taps still work. Catching a hairline crack early is far cheaper than dealing with a collapsed line under your yard or foundation later.
- Watch for unusually soggy patches in the yard away from sprinklers
- Check indoor drains for slow performance after a major storm
- Note any sewage odor, which can indicate a cracked line
Yard Structures and Trees Weakened by Wind Stress
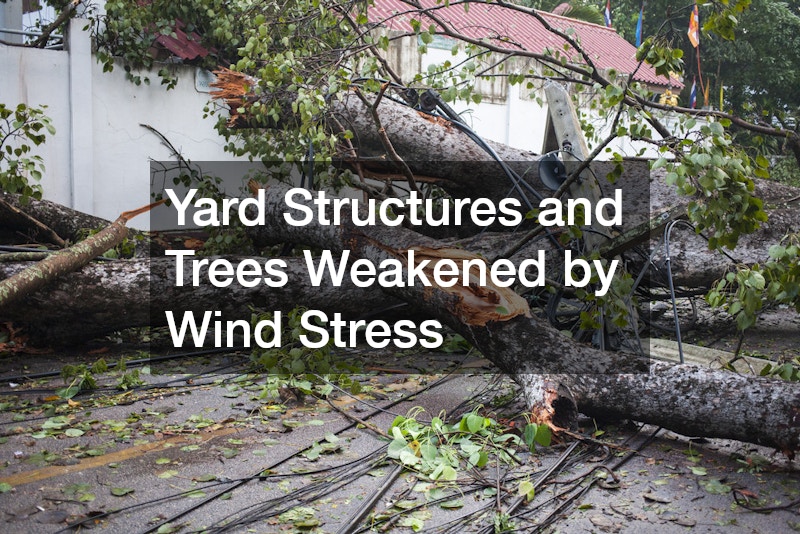
The damage a storm leaves in your yard can be just as costly as what happens to your house, especially when it comes to trees and outdoor structures. A tree that looks fine after a storm may actually have hidden root damage or internal cracking that makes it prone to falling weeks or months later. Removing a hazardous tree is only half the job, since the leftover stump can attract pests and interfere with drainage or future landscaping plans.
Professional stump grinding after storm-related tree removal clears the way for regrading, reseeding, or installing new drainage solutions that prevent water from pooling near your foundation. It also eliminates a hiding spot for termites and other wood-destroying insects that are drawn to decaying stumps.
- Inspect nearby trees for leaning, exposed roots, or split trunks
- Check for broken branches caught high in the canopy
- Look for fresh cracks in trunks that weren’t there before the storm
Outdoor Living Features and Equipment Damaged by Debris
Backyard amenities often take unexpected hits during storms, and the damage isn’t always obvious until you try to use them again. Hail and flying debris can crack casings, damage pumps, or compromise electrical connections on equipment that sits outside year-round. A hot tub company technician can check jets, heaters, and control panels for water intrusion or debris damage that might not be visible just from lifting the cover.
Beyond spa equipment, storms frequently expose or attract pest activity in yards littered with fallen branches and standing water. Pest control specialists are often busier after major storms because displaced rodents, ants, and mosquitoes move toward disturbed soil and debris piles looking for new shelter. Addressing both the equipment damage and the pest surge quickly keeps small problems from turning into bigger repair bills.
- Check hot tub covers for cracking or water pooling from hail impact
- Inspect exterior equipment housings for dents or loose panels
- Look for new pest activity near woodpiles or storm debris
Vehicle and Structure Surfaces Marked by Hail
While most conversations about hail focus on the house itself, hail and wind-blown debris frequently affect vehicles parked in driveways or carports during a severe weather event. Small dents and chipped paint might seem cosmetic, but exposed metal can rust quickly if left untreated, especially in humid climates. Getting an early assessment prevents a minor paint chip from turning into a larger rust repair.
Car paint shops that specialize in hail damage repair can often use paintless dent removal for minor dings, which preserves the factory finish and keeps repair costs lower than a full repaint. It’s worth getting an estimate soon after the hail event, since insurance claims for this type of damage typically have a filing window that closes faster than most people expect.
- Check hoods, roofs, and trunk lids for small circular dents
- Inspect for chipped paint around mirrors and door edges
- Photograph damage promptly for insurance documentation
Storm damage rarely announces itself all at once, which is exactly why a thorough inspection matters more than a quick glance at the roofline. Working through your roof, chimney, gutters, walls, electrical, plumbing, and yard systematically helps you catch problems while they’re still small and affordable to fix. Don’t wait for a stain, a smell, or a spike in your utility bill to tell you something’s wrong behind the scenes. Schedule the inspections that matter most for your situation now, and you’ll avoid the far more expensive repairs that come from ignoring hidden storm damage.